Curried Lentils: Super foods for super cheap!

Who doesn’t love a good, healthy, cheap super food? I know that anytime I can make a food in bulk for pennies, it’s a serious win!! Lentils is definitely one of those foods! Super cheap, but also super nutrient dense!

Lentils are great sources of protein and carbs, as well as providing multiple nutrients. Lentils are also one of the best carbs that are antiinflammatory, as they are not highly processed, nor loaded with fillers/sugars.

Another great thing about lentils is that you can literally flavor them any way you like. My favorite is definetely curried lentils. For me, I actually like them for breakfast with two over-easy eggs. But they are also an excellent lunch and dinner side.

The best thing about this recipe is that you can do it on one pan. No need to dirty a whole lot of dishes. Let me walk you through the process step by step.

Start by putting the following into your pan on low heat:
1tsp olive oil
4 diced garlic cloves
1 full diced onion
1tsp diced or powdered turmeric
1tsp roasted red pepper flakes.

Let these ingredients saute on low heat for about 5 minutes. Together the garlic, onion, turmeric, and red pepper are excellent sources of anti inflammatory foods.

After those have heated and small amazing, add in 1 cup diced mushrooms. Let them heat for about 3-5 minutes. Mushrooms are also excellent for your immune system!

Now you’re ready to add in 1 large can (28ounces) of crushed tomatoes, with 1 small can tomato paste – which also contribute to your daily vitamins and aid your digestive system. Stir well. Leave on low heat for another 3-5 minutes.

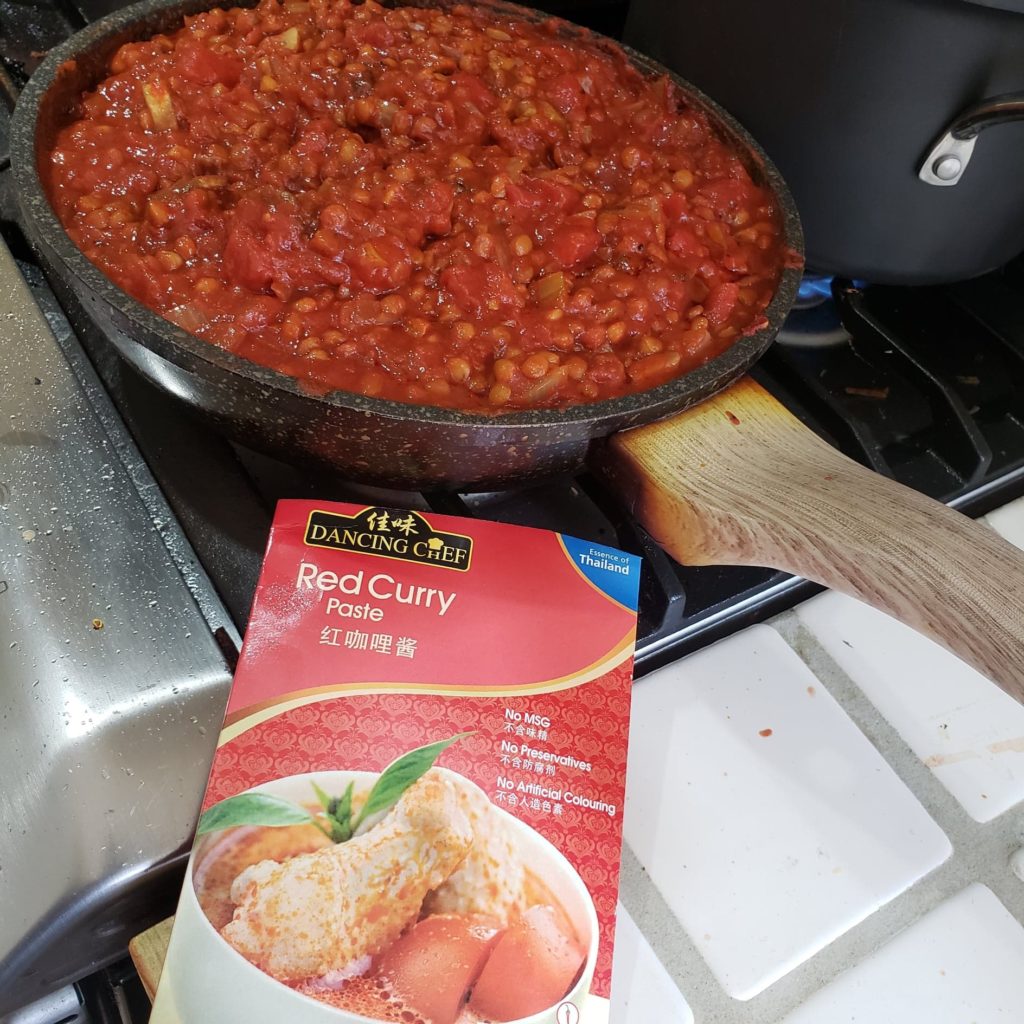
Once all your veggies have mixed well and the flavors have come together over low heat, you’re ready to add your lentils. Add in 3 cups of lentils (assumed that you’ve already soaked them).

This is when you can add in your curry. Use a curry packet/powder of your choice. This is where you have to work with the flavors based on your liking. Add in as much or little as you want, depending on how much flavoring/spice you want. I’d suggest adding about 1tbsp at a time, let it simmer. Taste Test. Then go from there and decide if you need more. Continue gradually adding until you’ve reached the desired taste.

With this recipe, using 3 cups of lentils – that is 6 servings – since carbs should be eating 1/2 cup at a time. You can portion this out to six containers or leave in your fridge and eat throughout the week. It also freezes very well. So, feel free to double the recipe and freeze for future weeks.

Enjoy!


Quarantine Brownies, anyone?

All jokes aside, I really did purchase baking cocoa powder, peanuts, and chocolate on my last grocery store trip before “shelter in place” began. I know that chocolate is my weakness and I knew baking is comforting. I knew that eventually I’d want to experiment.

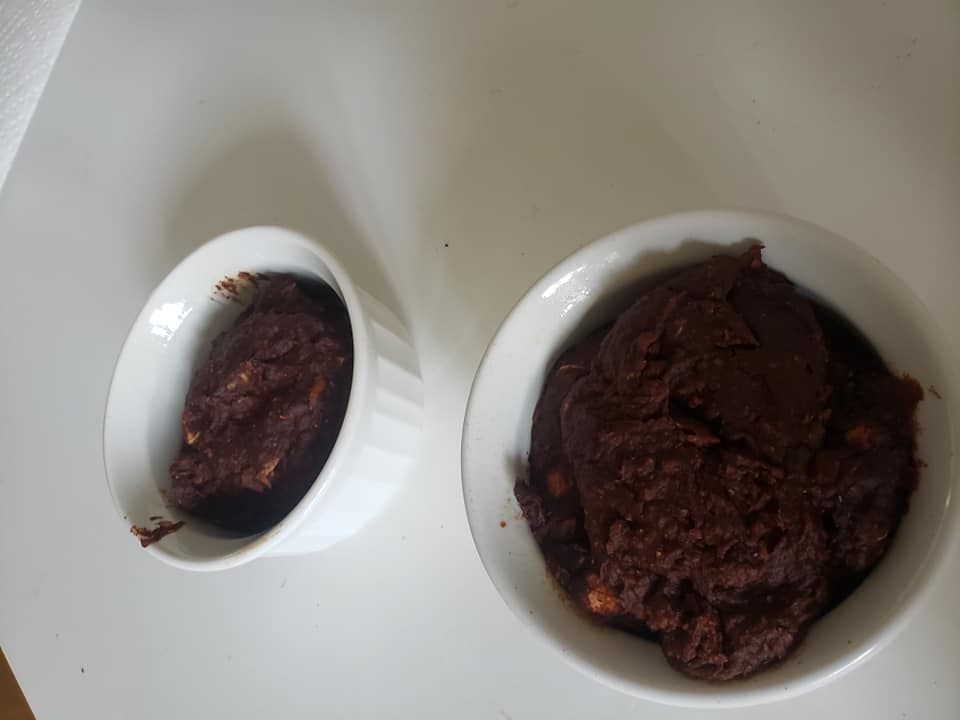
So, let’s talk about sugar free, yet super chocolately-nutty brownies. And, why are they in individual ramekin dishes? Well, first of all, we have a rule in our house that we can only bring in desserts in individual portion sizes and we can only bake sweets in the amount we’ll eat in that sitting. We try hard to not have sweets and processed foods just hanging out. Because, let’s be honest – we’ll eat it all that night.

So, I made just enough for two individual ramekin dishes for Josh and I. I made them in FIVE easy steps!

Step 1: Bake 1 sweet potato until soft.

Step 2: Put the following into your blender: 1 cup mashed sweet potato, 1/4 cup baking cocoa powder, 1/2 cup nut butter of your choice. I had actually made 1/2 cup worth using powdered peanut butter. Add in about 1tbsp natural honey. Blend well until a brownie mix consistency.

Step 3: This is when you can add in any “extras” of your choice. I added in 1/4 cup peanuts for a nutty brownie. But you can add in any nuts, chocolate chips, dried fruits or anything.

Step 4: Pour equal amounts into your ramekin dishes.

Step 5: Bake 12-15 minutes at 350 degrees, or until baked all the way through.

Remove from the oven and enjoy!

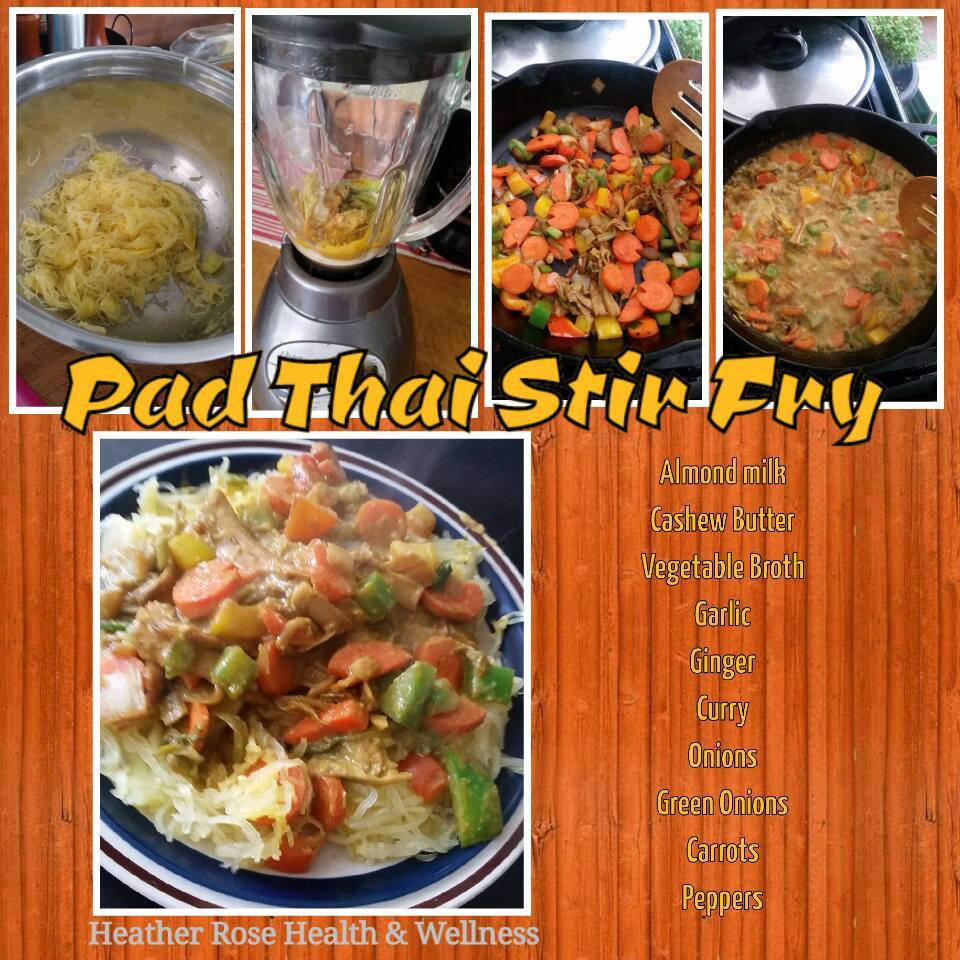
Vegan Pad Thai Stir Fry – in 5 easy steps

Let’s talk about ways to make vegetables last longer without wilting, getting filmy texture, or getting soggy. Stir fries are always great! But stir fries with flavors and that can freeze are even better!

Like most of my recipes you’ll read about on my blog, I didn’t measure a single thing for this stir fry. I have a rule in my kitchen: measure with your heart. That simply means, if you like that ingredient, add as much of it as you want. If you don’t like it, only add a little bit or simply eliminate it entirely.

Pad Thai Stir Fry is no different. Use what you like, get rid of what you don’t. Let’s talk about this in FIVE easy steps.

Step 1: Cut your spaghetti squash in half and bake it for about 40-45 minutes depending on size. The larger the squash, the longer is bakes. The smaller the squash, the less it needs to bake.

Step 2: While your squash is baking, you’ll make your cream. I’d suggest putting about 2-4tbsp of cashew butter into your blender with about 1/4 cup of vegetable broth. Add in 2-3 garlic cloves, about 1-2tsp of garlic, 1-2tsp of ginner, 1-2tbsp of curry. Blend it all together. Again, if you like one of those flavors a lot, add more. I LOVE ginger and always add a lot of it! Blend it all really well until it becomes a creamy texture. Use this moment to play in the kitchen. Experiment with your blender and the flavors here. Add more of things as you go if you’d like.

Step 3: Let the blender set for a while and start stir-frying your veggies in a saute pan. Start with 1tsp coconut oil in the pan. Add in 1 diced onion and let it become carmelized and flavorful in the coconut oil. Add in some diced green onions and about 2-4 sliced carrots – more if you love carrots as much as I do. Let the carrots get soft before adding in your peppers. I say: think Asian stir fries. Go for the color in your peppers. Add a few of each color. Let all those veggies fry together for a hot minute.

Step 4: Remember the sauce in your blender. Pour that into your veggies and stir well. Leave it on a low simmer for about 3-5 minutes.

Step 5: By now your spaghetti squash may be done. Take it out of the oven. Scoop it out onto your plates. Give each person about 1 cups worth of spaghetti squash. Top with as much veggies as they’d like.

Now realize – you can add whatever foods into this stir fry you’d like. I’ve made it many times and put different veggies in. For example, I have started adding mushrooms because they are delicious and I feel like mushrooms appear in a lot of Asian recipes. You can also add in some chicken or sausage so you have some protein in your stir fry.

I encourage you to use this as a “foundation” to your stir fry. Think outside the box, make some changes. Make it the way you like. When you try it, snap a photo, post it and tag me.

Lastly, this does freeze well. So if you have loaded up on veggies while quarantined, make some stir fry in bulk and freeze it.

Tofu Tomato Soup


Doesn’t everybody just feel better and a sense of comfort with a good ol’ creamy tomato soup? I know that I do. I love a good, creamy soup of any kind. But, this one really really really hits the spot for me.

I thought that during times of shut down, quarantine, and staying in, that this might come in handy. The ingredients are easy to buy canned/frozen and it’s easy to make in bulk. And, great news is that it’s fairly cheap. The other added benefit to this soup is that the tofu brings a sense of creaminess and PROTEIN. Tofu has 18 grams of protein in one serving, it’s plant based and super healthy for you!

Now, before you see the recipe and ask about substitutions, modifications, changes and all that, just remember that this is YOUR recipe, and you can make it the way you like. You can use more or less amounts of certain ingredients. Or, you can entirely eliminate some ingredients. This all depends on what YOU like in your tomato soup. I’ve made tofu-tomato soup at least six time this year and never made it the same. I change things up based on what I feel like, what I have in stock, and what I don’t have. This right here is a basic foundation. There is no wrong way to make it.

To begin, heat about 1tsp of olive oil in a pan. Saute 1 large onion until carmelized. Add in 2-3 cloves of garlic. Add in 1 cup of diced mushrooms. Saute/heat these ingredients for about 5 minutes.

Transition these sauted items to your blender. Pulse for about 20-30 seconds.

Then add in 1 small can of tomato paste, 1 can tomato sauce, and 1 large can of crushed tomatoes into your blender. Blend really well.

After that has all blended, add in 1tsp crushed black pepper, a dash of salt, and 1tbsp basil. Pulse for about 10-20 seconds.

This is when you’ll add in your block of tofu. An entire block of tofu is about 4.5 servings. So, dice your block of tofu, add it to your blender, and blend. Realize now that you have approximately 4.5 servings or more of soup. If you are serving this right away, return the entire blended soup to a pan and heat until ready to serve.

On that contrary, if you are making this for your meal prep, portion it out and put it into a fridge or freezer. In a fridge, it stays good for about 5-6 days. In the freezer it will last as long as you need.

Recipe:
1tsp olive oil
1 onion
2-3 garlic cloves
1 cup diced mushrooms
1 can tomato paste
1 can tomato sauce
1 can crushed tomatoes
1 tsp crushed black pepper
1/2 tsp salt
1 tbsp basil
1 full block/package tofu


Stock Up On Nutrients

Wow! What a few weeks it has been. I don’t think there is anything that ever prepares you for your entire country to change in just a few days. But, since we are all in worry together (I prefer the word WORRY, rather than panic) let’s share some ideas.

I know that food is a comfort amenity that has been available to us in large portions over the years. As the grocery stores have been stripped clear over the past few days, it’s evident that food is definitely a source of comfort. While food is very important, I want to really talk about the difference of FOOD versus NUTRIENTS. I want to help you learn how to stock up on nutrients, rather than just food fillers. And, since you know I am a huge advocate of eating all the food groups and balancing macros, I am listing out the foods that fall into each category and save/freeze really well.

I’ve heard that proteins are very hard to find these days. However, if you can find some, frozen meats, canned meats, yogurts, and eggs all do last. You can also freeze yogurt. If it thaws with a weird texture, add some fruit and granola to make it into a parfait. Or blend it into a smoothie. But, please don’t deprive yourself of the amino acids and probiotics that proteins provide our bodies.

When it comes to your carbs, I know that oats, quinoa, rice, beans, barley, lentils and other dried goods don’t sound delicious. But, the great news is that you can make them taste like any dish. Curried lentils is one of my favorites!

When it comes to your fats, staying focused on your plant based fats will help. Seeds, nuts, coconut, and coconut oil last a very long time. These are dried goods that can be purchased in the bulk food section and last for months. Enjoy them!

Fruits and vegetables are going to be your biggest challenge. Rumor has it that even the freezer and canned sections are cleared out. Hopefully you can find at least a few. But hey, when you do, stock up. They last a while.

Need a good recipe to incorporate these foods in a “bulk” recipe. These are two “breakfast” recipes, but could actually be eaten any time of the day. And, your kiddos may love them, too!

Like I said, freezing yogurt is okay. Once you’ve frozen it, you can make some overnight oats. I’d say they last well for 3 days. After that, the texture gets weird. But, it’s balanced macros and delicious!

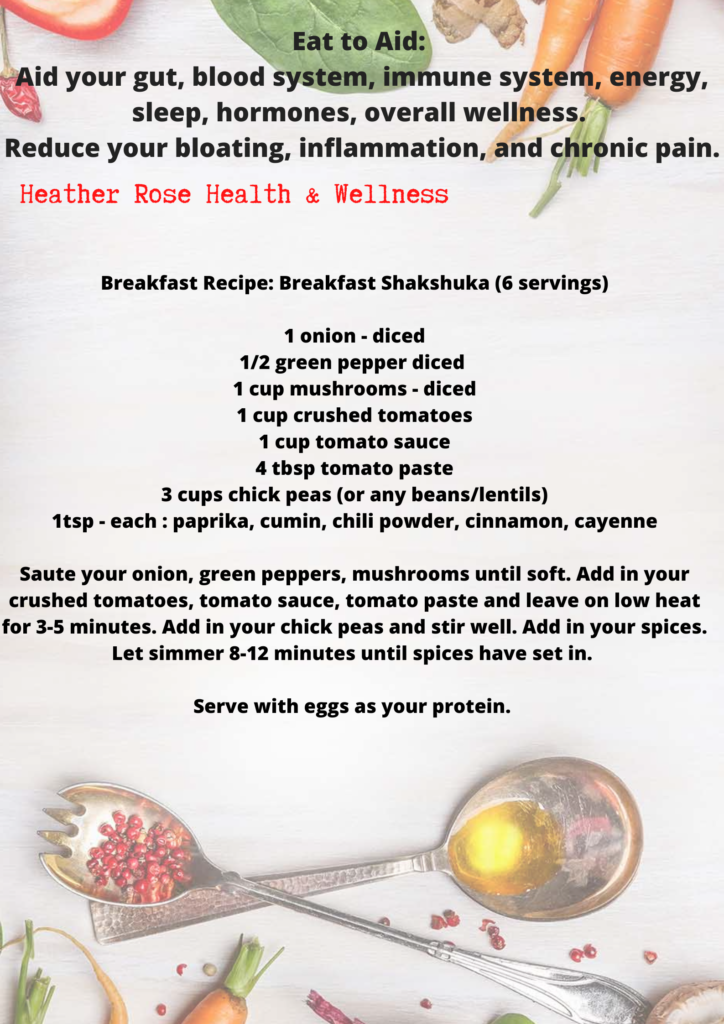
Breakfast shakshuka is one of my favorites. I LOVE any type of Mediterranean/Arabic/Indian flavored foods. This recipe is perfect becuase not only are these items fairly easy to find in bulk and it freezes well, but it’s also very anti inflammatory. So if you are eating to stay healthy, lean, free of illness, this one is super helpful.

Enjoy these recipes. Try them. Take photos. Post them, tag me!

2020 – Goals, Line Up, and Infinite Limits

Am I the only the that looks at the number “2020” and sees multiple ways you could make the infinity sign? Every time I think about 2020, I feel like it’s going to be the year of infinite opportunities and chances to just LIVE.

I took a million chances in 2019: career, certifications in nutrition, more credentials in fitness, expanding my fitness instruction schedule, and more. I saw growth in my business that I didn’t expect. 2020 is MY year to reep the benefits of all that growth, bring life to bigger dreams, and just keep progressing.

That being said, I have decided on my “big races” for 2020 and my race goals. I mean, goals are always progressing and changing, but these are the base line foundation of what I’d like to accomplish:

March 2020: Canyonlands Half Marathon in Utah – 13.1 miles. I’d LOVE to PR this race, putting me at a 2:02 half time. I’d really LOVE to run a sub 2.

June 2020: Steamboat Full Marathon – 26.2 miles. I’d LOVE to PR this full, putting me at a 4:33 marathon time. I’d LOVE a sub 4:30.

July 2020: Grand Island 50k In Michigan – 31 miles. This is essentially my exciting race of the year. The traveling to get from small mountain town Colorado to remote island in Lake Superior is an experience in itself. With a 50k cut off time of 7.5 hours, that would put me at my PR for a 50k. My previous 50k times are 8 hours.

On a side note of Grand Island – I am from Michigan and I have a huge spot in my heart for the Upper Penisula and Lake Superior. I actually ran my first full marathon along Lake Superior, and recently went back to Mackinac Island to run the half marathon. I am really excited to get the opportunity to run an ultra on Grand Island with all day views of Lake Superior is rare. It’s not a populated island, it’s very remote, it’s wilderness. Not many people get to experience the entirety of the island. I’m stoked to enjoy every moment and every step of all 31 miles!!!

October 2020: Madness in Moab 24 hour event. While I’ve been terrified of the 50 mile distance and horrific cut off times, I decided to go for a 24 hour event. I thought I’d enjoy myself much more without the thought and mindset of chasing cut offs or being pulled off course. I think the 50 mile distance should take me about 16 hours, so the 24 hour event gives me plenty of time. This is a first year event and right on Halloween. So, either way it will be plenty of fun.

I am sure I will run a few small races here and there between these bigger ones. But, this half to full to 50k to 50 mile is my overall line up. I will be loving every bit from desert to mountains to lake and back to desert.

Spread the holiday cheer!

You know how it goes – there are many holiday parties on your calendar. You need to come up with some dish to pass ideas. You want to be able to eat something healthy, but not be “that” person with the store purchased veggie tray.

You want something thought out, something with some heart and soul in it. You want something cute, but something that will WOW others around you.

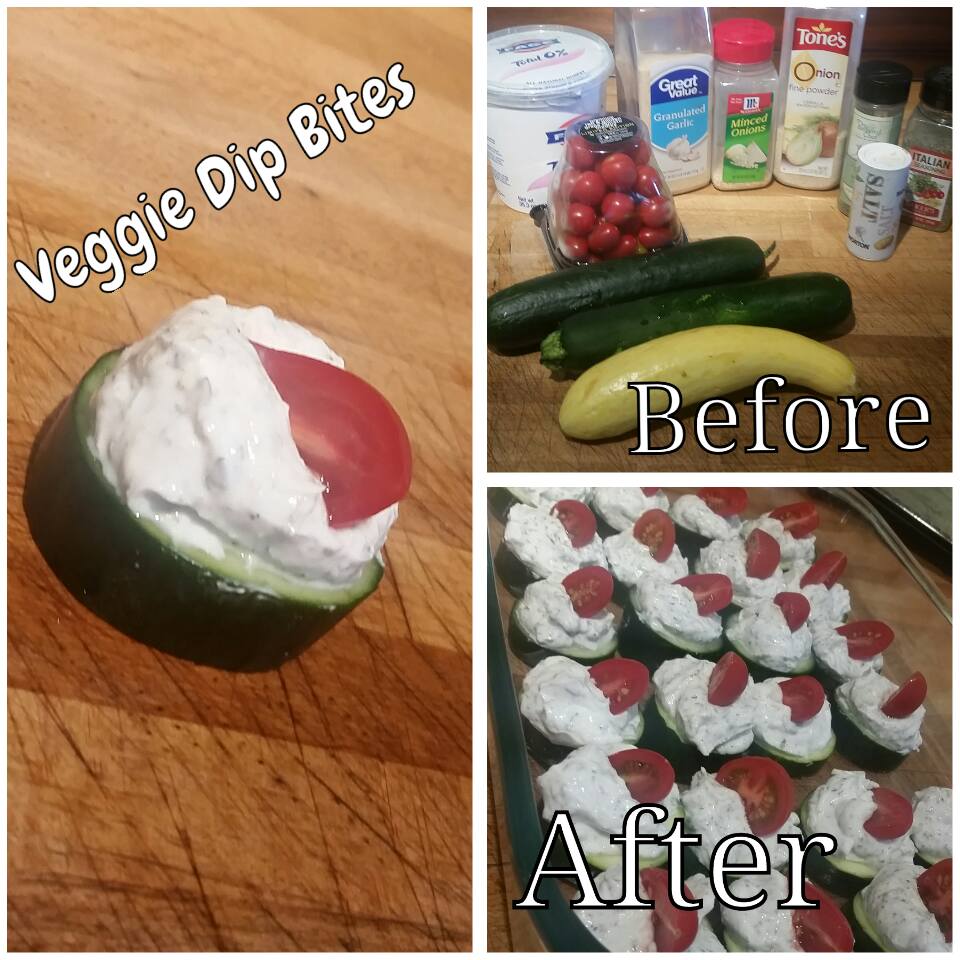
Great news! Greek Yogurt is the new cauliflower – it can become anything! Greek Yogurt can become a taco dip, a cookie dough, a pumpkin pie filling, a cheese cake, and in this case – a ranch flavored appetizer. Score! The recipe is at the bottom!

Essentially you can do this with any veggies you want. But I found it easiest to use yellow squash, zucchini and cucumbers and cherry tomatoes for the top. One of each veggie made about two dozen bites. As far as your Greek Yogurt ranch dip, you’ll need Fage 0% Plain Greek Yogurt – this is the only Greek Yogurt without added sugars and the only one that has higher protein than carbs. For your ranch flavoring, you’ll need garlic, onion, dill, Italian seasoning.

You can see from the photos that you basically need to slice your veggies, top with your Greek Yogurt Dip mix and then top with a half a cherry tomato. Presented on a beautiful platter, it brighens up a holiday party, bring a healthy option to those trying to maintain balance in their nutrition, and becomes a great conversation starter at a party.

Greek Yogurt Ranch Dip:
1 cup plain Greek Yogurt
1/2 tsp garlic powder
1/2 tsp onion powder
1/2 tsp dried dill
1/2 tsp Italian seasoning
Optional: Chives, salt, Worcestershire Sauce

WinteryWonderland Soup! Tofu Misu Soup!

Not only is it winter time, but it’s snowy here in Colorado! I have been craving some easy, quick hot soups that don’t come from a can or packet. Plus, I have been working on getting at lease one vegan mean in per day as I try to consume 50/50 animal and vegan proteins each day for digestive reasons.

After traveling to Asia last month, I have been obsessed with the idea of trying different ways of misu and different ways of tofu. I had all the ingredients on hand for this recipe and it just happened to turn out perfectly.

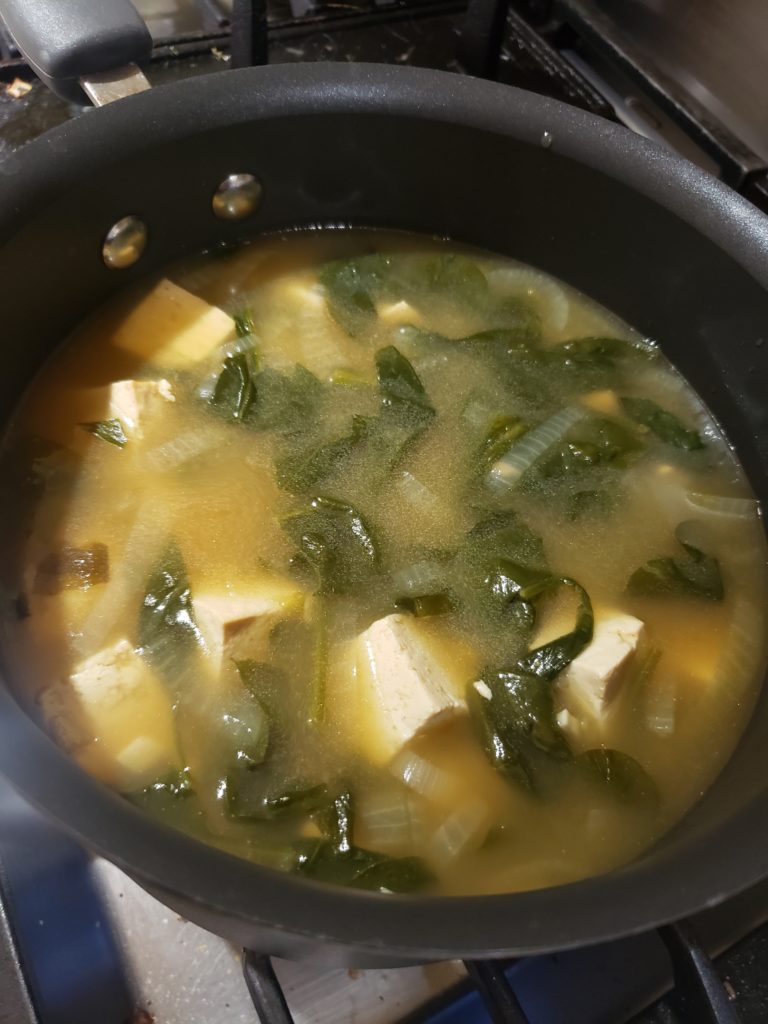
To begin, have two pans ready: a stir fry type pan and a stock pot. In each pan, heat about 1 tsp of coconut oil. In the stir fry pan, leave it on low heat and add your cubed tofu. Cover it and let it is sit. In your stock pot, allow the coconut oil to heat before adding your diced garlic. Let the garlic sizzle just enough to create a garlic aroma in your kitchen. Now, add your onion. Let those three ingredients heat together bringing their magic together. These three ingredients alone are very dense in vitamins and minerals that help boost our immune system. while these three ingredients are cooking together, occasionally check and stir your tofu. It doesn’t have to cook, as it will cook later in the soup.

After these three ingredients have heated, caramelized a little bit and smell amazing, turn your heat to very low heat. Add your vegetable broth. Cover pot and let sit for about 5 minutes while the broth absorbs the flavors and it simmers. After five minutes, add your spinach. Again, let sit another five minutes allowing the spinach to wilt and absorb the broth and flavors. After those five minutes go by, transfer your tofu from the stir fry pan to the stock pot pan. Now you have coconut oil, garlic, onion, veggie broth, spinach, and tofu in the stock pot. This is when you add your water and misu paste. These are your last additions.

Now, cover the pot and let sit on simmer for at least another 15 minutes for everything to heat together and absorb all the flavors. When ready, serve 1-2 cups per bowl and enjoy.

Tofu Misu Soup:

2tsp coconut oil
2 garlic cloves – diced
1 large onion – diced
1 full bag of baby spinach
32 ounces vegetable broth
32 ounces water
1 package of firm tofu – cut/cube it in sizes you like
2 tsp misu paste – white or red misu paste is fine

What’s in the bowl?

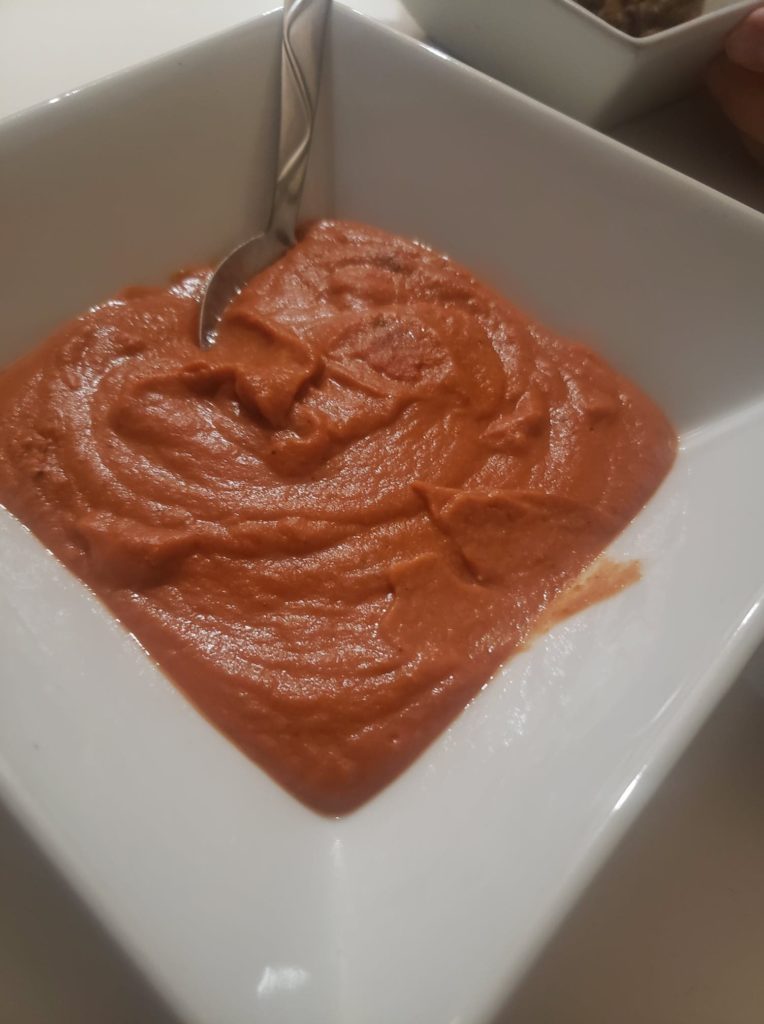
Last week I put this photo up on facebook with the very generic question, “What’s in the bowl?” I got over 45 guesses! Guesses ranged from a hot spicy mustard dip, to banana cashew mousse, to greek yogurt with flavors mixed in and more.

Yes, a lot of people did guess various flavors of hummus, but I don’t think anyone guessed that it was hummus made from vegetables and completely lacked chickpeas! Now, the reason I feel this is so exciting is because in the world of macros, chickpeas alone are actually a carb, and in hummus form with tahini, they’re a healthy fat. While carbohydrates and fats are really healthy, sometimes, I just want to eat a larger amount of hummus with less calories! And, anytime we can add vegetables into our day is a healthy day!

Bam – this is it! This is a way to prepare a homemade recipe of hummus, made from vegetables, packed with flavor that you can eat in a larger amount without all the guilt. The secret ingredient: butternut squash.

I cut the butternut squash in quarters, baked it for 45 minutes. I pulled it out of the oven, removed the skins, cubed it, measured it out, and put it in my food processor. I then added the olive oil and pulsed the processor. Once fairly smooth, I added the tahini, followed by the lemon juice, followed by the paprika.

This was a HUGE hit my house. Josh and I ate this hummus with vegetables, with tortilla chips, and even in our salads. Clearly we went through the first batch in a day and I had to make a second batch. It was that good!

Lastly, the best thing about this recipe of hummus is that you can make it any flavor you want. Once you create the base hummus, you can in so many different flavors to enjoy: roasted red peppers, chipolte, cilantro, garlic, pumpkin, or anything! I’d love to see what flavors YOU try!

If you try this recipe, share it on social media, tag me, or hashtag #heatherrosewellness

Recipe:
2 Cups Baked/Cubed Butternut Squash
1/4 Cup Olive Oil
2tbsp Tahini
2tbsp Lemon Juice
1tsp paprika

Add all to the food processor or blend. Blend well, and enjoy.